Setting up an Organised Folder Structure for Research Projects
Research projects tend to generate a lot of documents, ranging from project proposals, ethics forms, notes and to-do lists, publication drafts, graphs, PowerPoint presentations – to name just a few. And, of course, let us not forget all the experimental materials, collected data, and analysis code. It is easy to see how the files can quickly become disorganised and lead to increasing amounts of time and stress as one tries to find, store, and retrieve all of them. Indeed, I have authored quite a number of poorly managed project folders myself. Some of them grew to such proportions they ended up developing sentience and serious self-esteem issues.
Happily, I have developed an approach which helped me manage the digital side of my research much more successfully, and am willing to share. The key is in adopting a logical and consistent project folder structure. Having an already existing and uniform folder structure prior to starting a research project means you can work more efficiently, find your files more easily, prevent duplication, and be able to share and work collaboratively while minimising the risk of data loss. A sample project, organised using this approach, looks like this:
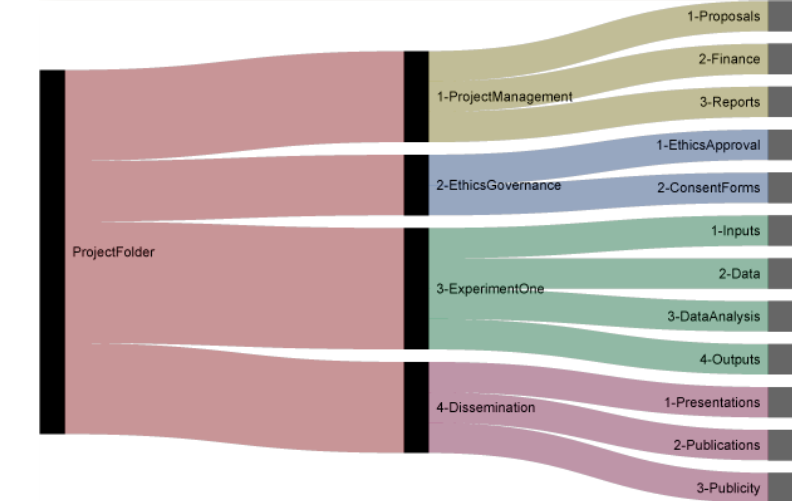
Here is a brief explanation of the folder hierarchy. Note that every folder is numbered in order to preserve a fixed ordering.
ProjectManagement – obviously enough, this is the folder where you keep all your files related to managing and planning your research project. For example: Project Background, Project Proposals and Plans, Funding Applications, Budget, Project Reports.
EthicsGovernance – in cognitive science, more so than perhaps in many other sciences, meeting legislative requirements and properly managing ethical and privacy issues is essential. This is why my folder structure contains a separate folder for documents such as: Applications for Ethical Approval, Insurance, Participant Information Sheets, and Consent Forms.
ExperimentFolder – this folder is the heart of your research project and contains all files related to the design and implementation of your experiment, as well as data collection, processing, and analysis. The experiment folder contains several subfolders to help you organise your files:
1. Inputs – this is the place to store any files and documents used in the experimental task itself. This could be anything from picture and word stimuli, audio recordings, task instructions, as well as the MatLab/Python/E-Prime/Java/HTML or any other code used to run the actual experiment.
2. Data – this folder contains all the raw data files collected during the experimental session. For example, raw reaction time data files for your participants. Only original data files should be kept here.
3. DataAnalysis – here you can keep all “intermediary” files: files pre-processed or transformed for further statistical analyses, including any analysis scripts (for example R or SPSS code)…
4. Outputs – this folder is useful to store all the analysis “output”, such as SPSS output, tables, but also graphical output such as figures and diagrams. Having these files in one place will make the experiment write up easier, for example for reports, conference presentations, or publications.
Dissemination – the last but not the least important folder is the Dissemination folder. As the name says, this is a central location to keep organised any documents related to disseminating your research findings to the scientific and wider community. This is where your journal articles will reside, but also any conference papers or posters which report the experimental findings. Not to be dismissed – this is the 21st century, after all – is any media coverage and publicity, such as newspaper interviews, articles, and the like.
This is the basic structure. Of course, you can always extend it by adding more subfolders, but make sure not to modify the top-level folder hierarchy. Whenever you start a new project, you just need to copy over the basic “template” structure, instead of having to create each subfolder manually. You can get the folder structure template here:
Alternatively, you could use Christina Van Heer's script to generate the folder structure automatically, using Terminal. See here:
There we go. I find this folder structure to be relatively simple, and thus able to accommodate all of my research projects, yet detailed enough to cover all the most important managerial aspects. I hope someone tries it out and finds it useful, in which case please let me know – I’d love to hear tips and experiences with this or any other method!